Choose a 600×600 office panel light that matches room lux, UGR and driver controls to balance energy, comfort and procurement risk. A 600×600 office panel is a nominal 595×595 mm modular ceiling luminaire designed to fit standard T15 or T24 grid systems. It affects energy, visual comfort and total lifecycle cost.
Define target lux and UGR limits and request IES and LDT files and full datasheets. Instrument the layout using the sizing formula and model maintained lumens for delivered lux verification. Publish RFQ requirements that specify driver protocol, warranty, lead time and minimum order quantity.
Review procurement outcomes after two cycles or one quarter and validate delivered photometrics, commissioning records and warranty evidence. Procurement managers, project managers, lighting designers, facility managers and specifiers will own verification and commissioning sign-offs and escalate photometric mismatches to suppliers. OLAMLED modular panels report 140-160 lm/W efficacy, with backlit models up to 180 lm/W as stated on product datasheets. Use the specification checklist and installation sections below with the 100 m² example baseline of 25 panels at 36W as a starting point.
Choose a 600×600 office panel light that matches room lux, UGR and driver controls to balance energy, comfort and procurement risk. A 600×600 office panel is a nominal 595×595 mm modular ceiling luminaire designed to fit standard T15 or T24 grid systems. It affects energy, visual comfort and total lifecycle cost.
Define target lux and UGR limits and request IES and LDT files and full datasheets. Instrument the layout using the sizing formula and model maintained lumens for delivered lux verification. Publish RFQ requirements that specify driver protocol, warranty, lead time and minimum order quantity.
Review procurement outcomes after two cycles or one quarter and validate delivered photometrics, commissioning records and warranty evidence. Procurement managers, project managers, lighting designers, facility managers and specifiers will own verification and commissioning sign-offs and escalate photometric mismatches to suppliers. OLAMLED modular panels report 140-160 lm/W efficacy, with backlit models up to 180 lm/W as stated on product datasheets. Use the specification checklist and installation sections below with the 100 m² example baseline of 25 panels at 36W as a starting point.

600×600 Office Panel Light Key Takeaways
- Nominal 600×600 panels are manufactured at 595×595 mm to fit T15 or T24 grid ceilings.
- Select panels by matching target lux, UGR and lm/W to space type and task requirements.
- Request IES and LDT photometric files, full datasheets, and UGR test method with every RFQ.
- Specify driver protocol DALI or 0-10V and confirm power factor and dimming curves.
- Calculate panel count using (Area × target lux) ÷ (tile luminous flux × 0.7) loss factor.
- Plan warranties and L90 or L70 data into lifecycle cost and require verification documents.
- Include lead time, MOQ, emergency kit compatibility and installation hardware in tender.
What Is A 600×600 Office Panel Light?
We define the office panel light 600×600 as the nominal 600 mm × 600 mm modular ceiling module engineered for modular grid ceilings and specification-led commercial projects.
Most 600×600 office panels ship as 595 × 595 mm actual modules designed to fit T15 or T24 grid systems (source). OLAMLED models confirm this standard sizing for seamless drop-in installation (source).
This sizing makes the product compatible with the majority of suspended ceiling 600×600 installations and simplifies retrofits.
Common form-factor variants and their tradeoffs are as follows:
- Edge‑lit panel: ultra‑thin profile (8-12 mm), suited to shallow plenums and exposed aesthetics; lower per‑tile lumen output but strong uniform appearance.
- Backlit LED panel: deeper body (25-40 mm) with higher flux and improved uniformity for open‑plan and high‑task zones.
- Troffer‑style integrated panel: larger internal volume for high flux, integrated drivers, and sensor mounting.
Typical wattage and lumen ranges for a 600×600 LED panel are:
- Wattage: ~24W to ~60W per tile.
- Lumen output: roughly 2,400 lm to 9,000 lm per tile.
Design decisions should follow tile luminous efficacy and ceiling depth rather than list‑price alone.
Designers should confirm LED panel lumens 600×600 per tile when modeling layouts and specifying return on investment.
Visual comfort and color specifications determine workplace suitability.
Unified Glare Rating (UGR) targets are commonly UGR<19 for display‑screen work; many projects specify UGR<16 for reduced contrast and visual comfort. Use a UGR<19 LED panel where screen work is primary.
Color Rendering Index (CRI) targets: CRI ≥ 80 for general office tasks and CRI ≥ 90 for color‑critical work.
Correlated Color Temperature (CCT) options typically include 3000K, 4000K and 6500K, and illuminance targets should reference NF EN 12464‑1.
When estimating tile quantities, apply the industry rule and examples:
- Formula: Number of tiles = (Area × desired lux) / (tile luminous flux × 0.7).
- Example 1: Small meeting room → 6-9 panels at 36W, 4000K to achieve 300-500 lux.
- Example 2: 100 m² open office → ~25 panels at 36W as an initial design baseline.
Lifecycle, controls and installation considerations for procurement include:
- Lifetime and warranty: rated LED life ≈ 50,000 hours and typical 5‑year warranty; fluorescent alternatives show much shorter lamp life.
- Controls compatibility options: Digital Addressable Lighting Interface (DALI), 0-10V and wireless Casambi or Wi‑Fi systems.
- Integration patterns and wiring options are documented in lighting controls for led panels.
- Mounting methods: recessed grid, surface mount kits and suspended brackets.
- Safety features: IP40/IP65 ratings, emergency conversion kits and emergency pods available by model.
We supply OLAMLED 600×600 SKUs as nominal 595×595 mm panels with modular, replaceable LED modules to reduce minimum order quantities and accelerate delivery.
OLAMLED modular panels achieve 140-160 lm/W efficacy, while backlit models can reach up to 180 lm/W according to product specifications (source). Vendor datasheets confirm typical ranges of 130-160 lm/W for 600×600 panels. Available options include UGR<16/19, CRI 80/90 SKUs, DALI/0-10V/Casambi compatibility, Zhaga Book 18 sensor openings, TP(a) rated diffuser panel choices, emergency pods and accessory kits; final specifications and certifications are confirmed on the project datasheet and quotation.
How Do I Choose A 600×600 Panel For Offices?
We decide on a 600×600 panel by mapping space type to target illuminance, sizing panel counts with a practical loss factor, confirming mechanical fit and control compatibility, and then comparing lifecycle cost and compliance before awarding the tender.
The buying decision should address these areas for immediate evaluation and tendering:
- space-type mapping and glare limits
- lumen sizing and layout calculations
- output, efficacy and SKU fit
- glare, color and control requirements
- mechanical, electrical and installation checks
- cost, lifetime and procurement documents
Map room type to target illuminance and glare limits using the applicable standards:
- open-plan offices, private offices, meeting rooms, corridors, and reception areas and their target lux per BS EN 12464-1 / NF EN 12464-1
- target illuminance guidance for general office work: 300-500 lux; 500 lux for visually detailed tasks
- Unified Glare Rating (UGR) under 19 for screen-based work and a requirement to supply verified UGR test results with photometrics
Estimate panel counts and layout with a repeatable formula and example values: Apply the previously stated formula: Number of panels = (room area × target lux) ÷ (panel luminous flux × 0.7 loss factor)
- Recommended target lux: 300-500 lx depending on task and surface reflectances
- LED panel lumens 600×600 examples for planning: 24W 600×600 LED panel ≈ 2,400 lm; 36W ≈ 4,000 lm; 60W ≈ 6,000 lm
Match output, luminous efficacy and SKU selection to the project constraints:
- high luminous efficacy (lm/W) as a selection criterion to minimize energy and operating cost
- preference for multi-wattage or power-selectable SKUs to simplify retrofits and reduce replacement permutations; verify 600×600 LED panel wattage options on the datasheet
- request downloadable Illuminating Engineering Society (IES) and LDT photometric files and full lumen/watt tables for each SKU
- confirm each advertised LED ceiling panel 600×600 luminous flux against the datasheet and supplied photometric files before final specification
Set glare, color and controls to meet both visual comfort and commissioning needs:
- Unified Glare Rating (UGR) <19 for office installations and Color Rendering Index (CRI) ≥80 as a baseline; specify CRI ≥90 where color fidelity is critical
- Correlated Color Temperature (CCT) options: 3000K, 4000K, 6500K and a requirement to report CCT tolerance on the product datasheet
- Digital Addressable Lighting Interface (DALI), 0-10V, Switch Dim and wireless systems such as Casambi for energy management and commissioning flexibility
- For dynamic white strategies consult the tunable cct controls for led panels guidance when specifying control architectures
Verify mechanical, electrical and installation constraints before procurement:
- check ceiling grid profile (T15 or T24) and choose recessed, suspended or surface-mount 600×600 options accordingly
- select edge-lit panels for ultra-thin voids and backlit panels for higher flux requirements
- confirm IP rating, TP(a) fire-diffuser classification, driver type (integrated versus remote) and availability of emergency conversion, suspension and recessed kits
Balance cost, lifecycle and compliance for tender evaluation with explicit documentation requests:
- Procurement teams can use €54-€170 per panel as a planning range for 600×600 LED panels, but quotes must include lead time and minimum order quantity.
- warranty and lifetime metrics provided as baselines: example rated life ~50,000 hours and L90 ≈ 52,000 hours; always request test or certification evidence
- ROI/payback calculation checklist for tender comparisons:
- establish baseline operating hours and tariff
- compute annual energy saving = (existing fixture W − new panel W) × annual hours ÷ 1,000 × electricity cost
- compute payback = panel cost ÷ annual energy saving
- required quotation documents: IES/LDT photometric files, full lumen/watt tables, compliance certificates (BS/NF/UKCA/CE where applicable), lead time, MOQ, warranty statement and installation accessories list.
What Are The Technical Specifications To Compare?
We recommend comparing electrical, optical, mechanical, controls, photometric, and compliance specifications to select a 600×600 LED panel that meets office energy, glare, and installation requirements.
Electrical specifications to require from each SKU:
- Input voltage and frequency: 220–240 V AC, 50/60 Hz for EU installations.
- Rated power and driver: confirm SKU-rated watts (planning range 24–60 W) and list driver model.
- Power factor: target PF ≥ 0.90–0.95 and include driver certification.
- Dimming and protocol: DALI compatible panel options and 0-10V drivers; see 1-10v dimming for led panels for implementation guidance.
- Luminous efficacy and ROI: report lm/W efficiency per SKU and provide the baseline energy model used to calculate operating cost.
Optical specifications that drive visual comfort and task performance:
- Luminous flux and Correlated Color Temperature (CCT): list lumen output and available CCT choices such as 3000 K, 4000 K, or 5000 K.
- Color Rendering Index (CRI): specify CRI ≥ 80 for general office areas and CRI ≥ 90 where color accuracy is required.
Reference the earlier Unified Glare Rating (UGR) target of UGR < 19 and include the UGR calculation method. - Diffuser and uniformity: request iso-lux diagrams and beam distribution data to verify contrast and discomfort glare control.
Panel design tradeoffs to match ceiling depth and photometric goals:
- edge-lit panel: thinner profile for retrofit and low plenum heights; verify delivered flux and uniformity against the stated lm/W.
- backlit LED panel: larger LED array for higher delivered flux and tighter control of beam shape.
- Verification requirement: require side-by-side IES/LDT photometric files when suppliers cite peak efficacy figures.
Photometric data and sizing items to demand from suppliers:
- Required photometric files: lumen output per SKU, luminaire efficacy (lm/W), iso-lux diagrams, beam distribution, and stated UGR method.
- Lumen maintenance and lifetime: request L90 with rated hours and the test method used to derive the value.
Use the previously stated sizing baseline: Number of panels = (Area × desired lux) / (tile luminous flux × 0.7). - Standards reference: reference EN 12464‑1 illuminance targets in tender documents.
Mechanical, environmental and mounting details to confirm:
- Dimensions and plenum fit: nominal 595 × 595 mm tile dimensions and maximum fixture depth for shallow plenums.
- Mounting options: recessed T15/T24, suspended, and surface-mount configurations.
- Ingress and fire ratings: request declared IP/Class ratings and specify IP40 LED panel options for standard interiors and IP65 LED panel options where moisture, cleaning, or washdown is required.
Controls, emergency and interoperability items to specify:
- Controls and sensors: occupancy and daylight sensors, DT8/DALI‑2 support for color control, and Bluetooth/Casambi mesh options where wireless commissioning is required.
- Driver flexibility and emergency: multi‑wattage or power‑select drivers and emergency conversion or self‑test kits with verified runtime.
- Energy compliance: document how the chosen control strategy maps to energy codes and programmable scene savings in the tender.
Compliance, warranty and procurement checklist:
- Evidence required: CE/UKCA marking, EN 12464‑1 alignment, applicable local code references, downloadable IES/LDT files, and full product datasheets.
- Warranty and lifetime verification: require verifiable warranty terms and supporting L90 lifetime test reports (for example, a 5‑year warranty and 50,000 h L90 stated as a baseline).
- Procurement directive: require downloadable datasheets and IES/LDT files with every tender and flag any specification inconsistencies for clarification.
What Is The Lumen Output And Efficacy?
We define lumen output and luminous efficacy to help specifiers select LED panel light options that meet target lux and energy objectives.
Luminous flux (lumen, lm) is the total visible light a fixture emits. Luminous efficacy (lm/W) is lumens divided by electrical power and shows energy efficiency. As an example, a spec listing 3360 lm at 24 W equals roughly 140 lm/W; some product lines report up to 180 lm/W or around 150 lm/W, and these figures must be confirmed against the product datasheet.
Read a spec sheet in this order to avoid hidden mismatches and confirm delivered light quality and efficiency:
- Nominal luminous flux (lm) and whether the value is initial or maintained output
- Luminous efficacy (lm/W) and rated wattage to cross-check the math
- Correlated Color Temperature (CCT) and Color Rendering Index (CRI) for visual requirements
- Power factor (PF) and driver ratings for electrical performance
- Lumen maintenance (L70/L90) and available IES/LDT photometric files
Lumen maintenance affects long‑term delivered light and maintenance planning:
- Example definition: Lumen maintenance (L70/L90) — L90 at 52,000 hours means the fixture retains 90% of initial lumens at 52,000 hours
- Practical impact: delivered lux falls over time according to the maintenance curve, so initial lm must be paired with L70/L90 to estimate maintained illuminance
Driver quality and control protocol change actual delivered light and power use:
- Electrical control: DALI, 0-10V, Switch Dim, and OCTO compatibility alter dimming behavior and effective lumens
- Driver characteristics: rated power factor (PF) and multi‑wattage drivers change real power draw
- Risk, control and escalation: poor driver quality can reduce effective lumens and uniformity; control by specifying drivers with published PF and dimming curves; escalate by requiring IES/LDT verification and a supplier performance warranty
Apply the sizing formula stated earlier: Number of tiles = (Area × desired lux) / (tile luminous flux × 0.7).
- Example calculation: 100 m² × 300 lux ÷ (3600 lm × 0.7) ≈ 12 panels
- Energy implication: selecting a 3600 lm panel at 150 lm/W versus 100 lm/W keeps panel count but reduces total power proportionally
Spec‑check checklist for specification and procurement:
- Initial lumens (lm), and whether value is initial or maintained
- Luminous efficacy (lm/W) and rated wattage
- L70/L90 life hours and maintenance curve
- Driver type, power factor (PF) and dimming compatibility (DALI, 0-10V, Switch Dim, OCTO)
- Calculated delivered lux using the formula and a maintenance factor
- Unified Glare Rating (UGR) and Color Rendering Index (CRI) with reference to EN 12464-1
We confirm all items against the datasheet and IES/LDT photometric files before final specification.
What Are The Color Temperature And CRI Options?
We select Correlated Color Temperature (CCT) and Color Rendering Index (CRI) to align lighting with task performance, visual comfort, and color fidelity in office projects.
Correlated Color Temperature (CCT) describes light appearance and is measured in Kelvin (K). Color Rendering Index (CRI) rates color accuracy on a 0–100 scale against a reference illuminant.
Set CRI ≥ 80 for general office tasks. Specify CRI ≥ 90 where accurate color discrimination matters. Many 600×600 LED panel product pages expose CRI filters (≥80, ≥90) to simplify comparison.
Common CCT options and typical uses are:
- 3000K — warm white for reception, break zones, and hospitality-adjacent areas that favor comfort.
- 4000K — neutral white. Specify a neutral white 4000K LED panel for open-plan desks and most professional office areas.
- 6500K — cool daylight for inspection, technical tasks, and high-contrast work that requires alertness.
Recommended CCT/CRI pairings by space and task are:
- Open-plan desks: 4000K with CRI ≥ 80 for balanced appearance and energy efficiency.
- Reception and break zones: 3000K with CRI ≥ 80 to reduce perceived glare and support comfort.
- Design studios and quality control: 4000K–5000K with CRI ≥ 90; specify a CRI 90 LED panel for accurate color matching.
For mixed-use floors, consider a CCT selectable LED panel or tri-CCT fixtures. On-site CCT selection is possible with cct tunable panel light, which reduces SKU counts.
Pair CCT and CRI choices with Unified Glare Rating (UGR) < 19 for screen-facing offices and reference NF EN 12464-1 illuminance targets. Specify CCT, CRI, UGR, and required lm/W on the RFQ so lighting designers can verify compliance.
What Is The UGR Rating And Beam Angle?
We use Unified Glare Rating (UGR) and beam angle to control occupant comfort and light distribution in open‑plan offices. Unified Glare Rating (UGR) quantifies discomfort glare seen by an occupant. Beam angle describes the angular spread of light from a luminaire.
Design targets tied to BS EN 12464‑1 (European standard for lighting of work places) are practical controls for specification and procurement:
- UGR<19 LED panel — screen‑first workstations where low glare and long visual tasks occur; require the manufacturer UGR value on the datasheet.
- UGR 19–22 — meeting rooms and breakout areas with mixed tasks and flexible layouts.
- UGR up to ~25 — storage, plant rooms, and non‑screen utility spaces where glare control is lower priority.
Beam‑angle choices depend on desk layout and uniformity needs:
- Wide distribution (100°–120°) or uniform edge‑lit/backlit 600×600 panels for dense open‑plan desk banks to reduce local contrast and shadowing.
- Medium or asymmetric beams (60°–90°) for linear aisles or bench layouts to direct light across desks while limiting overhead brightness.
- Tight or adjustable beams (30°–60°) for task and meeting zones where controlled contrast and lower UGR are required.
Practical specification checklist for tenders and datasheets:
- Require the supplied UGR value and IES/LDT photometric files.
- Prefer backlit panels for uniform wide output; note direct‑lit panels may need additional diffusion to meet UGR targets.
- Include UGR charts and target beam angles in the technical specification to verify performance before procurement.
How Does Installation And Retrofit Work For 600×600 Panels?
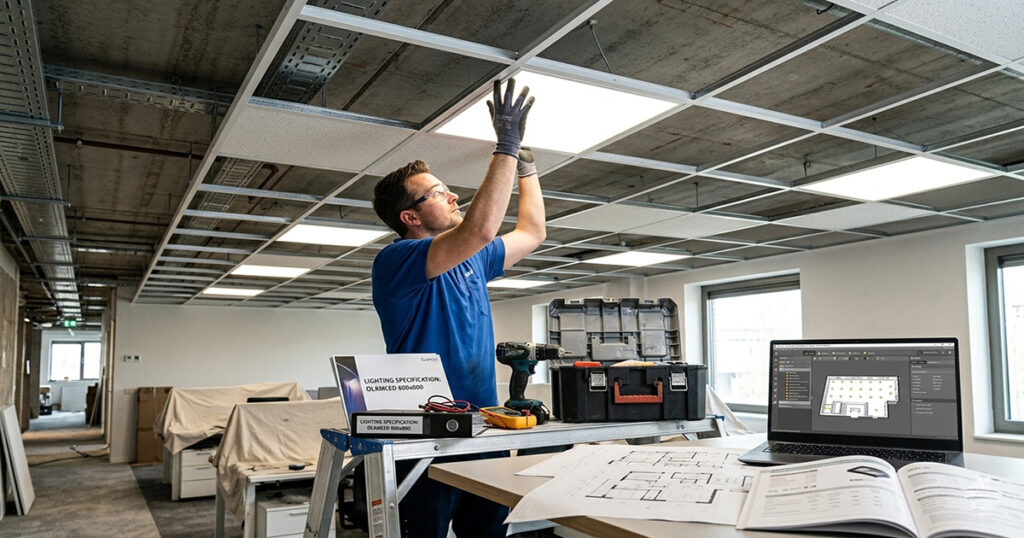
For reliable 600×600 LED panel installation, conduct a focused site survey and a pre‑mobilization checklist so the project meets schedule and warranty requirements.
Site survey checklist for the installer and specifier: Note nominal panel size 596×596 mm on the supplier datasheet and record ceiling finish and tile layout.
- Note suspended ceiling 600×600 compatibility and measure grid reveal and tile centers.
Record grid type (T15 or T24) and estimate retrofit fit for common European grids. - Measure plenum depth and document obstructions that affect recessed kits or suspension.
- Record supply voltage, phase, switchgear location, and emergency circuit routing.
- Identify TP(a) rated diffuser panel requirements and any local fire‑safety constraints.
- Photograph the grid, fixings, adjacent services, and any damaged tiles for remedial work.
Select mounting method based on void depth, access and finish requirements:
- Recessed drop‑in replacement for modular ceilings when the void allows standard driver access.
- Surface mount 600×600 LED frames for shallow voids or where recess kits are impractical.
- Suspension kits or slimline/backlit options for design or shallow‑void conditions.
- Specify IP40 or IP65 ingress protection as required and confirm TP(a) compliance for fire‑rated areas.
Wiring, driver access and control compatibility require verification before cutting tiles:
- Determine integrated‑driver versus external‑driver layout and locate driver access points.
- Isolate the circuit, route supply to the driver, use quick‑connect terminals, test polarity and earth continuity, and secure strain relief.
- Confirm control protocol support including Digital Addressable Lighting Interface (DALI), 0‑10V, Switch Dim and wireless systems such as Casambi.
- Check onboard driver power‑select or multi‑wattage settings before energizing to avoid incorrect lumen output.
On‑site testing and commissioning should be recorded for handover:
- Power on and verify luminous output; confirm Correlated Color Temperature (CCT) and Color Rendering Index (CRI) where color fidelity matters.
- Confirm Unified Glare Rating (UGR) is below 19 for screen‑based office zones and measure lux against design targets using IES photometrics or the practical sizing formula.
- Calibrate driver dimming curves and validate control responses.
- Test emergency and maintained functions and record final lux, serial/SKU and driver configuration for warranty traceability.
Pre‑mobilization checklist to reduce return visits:
- Pre‑order correct SKUs and accessories including drivers, an emergency conversion kit, and any suspension or recessed hardware.
- Confirm performance targets such as luminous efficacy (lm/W), example wattage ranges of 24 to 60 W, and typical lumen bands (approx. 2400 to 6000 lm) against the datasheet.
- Pack test gear: multimeter, lux meter, spare grid clips and spare tiles.
- Verify lifetime and lumen maintenance figures in the datasheet; use a baseline such as L90 for planning at 50,000 to 52,000 hours and size labor using install‑time benchmarks.
We will supply project‑specific datasheets and configuration checklists so final product selection, compliance evidence and delivery align with the installation plan.
What Are The Mounting Options And Stepwise Tasks?
Select the mounting method based on ceiling type, plenum depth, and the desired finish, since the choice affects installation time, compliance checks, and maintenance access.
When a suspended grid is present, choose recessed mounting for a recessed LED panel where the void fits the driver and wiring and the grid is T15 or T24. Steps to install recessed panels:
- Confirm grid type and ceiling tile size, isolate the circuit, and verify supply voltage.
- Remove tile, measure void depth, and decide integrated or remote driver placement.
- Install driver per manufacturer instructions and slot the nominal 596×596mm panel into the grid.
- Secure retaining clips or push‑and‑lock fittings and test light output with a switch and lux meter.
Required parts and tools for recessed installations:
- Panel with recessed kit or push‑and‑lock, insulated screwdriver, voltage tester, wire strippers, retaining clips.
Troubleshooting for recessed installations:
- Uneven seating: check grid squareness and warped tiles.
- No light or flicker: verify driver wiring and supply voltage and replace driver if needed.
- Color or comfort concerns: confirm Unified Glare Rating (UGR), Correlated Color Temperature (CCT), and Color Rendering Index (CRI) meet the specification.
Use surface‑mount mounting for solid ceilings or when the void is too shallow for recessing, such as under ~32 mm. Surface‑mount tasks:
- Mark and level mounting points and fix the backplate or canopy to the substrate.
- Position driver in the canopy or remote box, connect supply, and secure the panel to the plate.
- Seal edges if dust protection is required and test light levels.
Required parts/tools for surface mounts:
- Surface‑mount kit or canopy, masonry anchors or plasterboard fixings, drill, spirit level, wire connectors.
Suspended mounting supports architectural or shallow‑plenum retrofits and uses adjustable cable or rod kits. Suspension steps:
- Determine suspension points and load capacity and install anchors or grid clips.
- Attach cable or rod kit to the panel, route wiring to the ceiling box, level, and tension.
- Verify electrical connection and dimming control operation.
Required parts/tools for suspension:
- Suspension kit, load‑rated anchors, tensioner tool, multimeter.
Quick comparison table of typical panel outputs and guidance:
Power (W) | Typical lumens | Luminous efficacy (lm/W) | CCT options | UGR guidance |
|---|---|---|---|---|
24 W | ~2400 | 100–120 | 3000K, 4000K | <19 for offices |
36 W | ~3600 | 120–150 | 3000K, 4000K, 6500K | <19 |
60 W | ~6000 | up to 180 | 3000K, 4000K | <19 |
Common cross‑method checklist:
- Isolate mains and verify earth/ground continuity before any work.
- Confirm driver type, dimming protocol compatibility (DALI, 0‑10V), and swap drivers when flicker persists.
- Record labor time, non‑conformances, and replacement parts required to support 600×600 LED panel installation and procurement decisions.
How Much Energy And Cost Will A 600×600 Panel Save Compared To Troffers?
We quantify energy and cost differences so procurement teams can calculate payback and Return on Investment (ROI) for 600×600 LED panel light replacements and compare them to traditional troffers.
The baseline comparison and core formula are:
- Troffer baseline example: 4 × 18 W fluorescent troffer = 72 W installed load.
- Candidate LED panel light examples: common office SKUs 24 W, 36 W, 48 W (typical range 24-60 W).
- Annual kWh saved formula: Annual kWh saved = (W_troffer − W_panel) × operating_hours_per_year / 1,000.
- Technology note: Light Emitting Diode (LED) values must be confirmed from the OLAMLED datasheet.
Worked example with editable assumptions:
- Assumptions: 72 W troffer → 36 W panel, operating_hours_per_year = 2,000, electricity = €0.20/kWh.
- Calculation steps:
- Annual kWh saved per fixture = (72 − 36) × 2,000 / 1,000 = 72 kWh.
- Annual electricity saving per fixture = 72 kWh × €0.20 = €14.40.
- Flag operating hours and €/kWh for local substitution when preparing a quotation.
Per-fixture example table (2,000 h/year):
Product | Watts (W) | Typical lumens | luminous efficacy (lm/W) | Annual kWh (2,000 h) | Annual € saving vs 72 W @ €0.20 |
|---|---|---|---|---|---|
Fluorescent troffer (baseline) | 72 | 5,040 (example) | 70 | 144.0 | – |
LED panel 36 W | 36 | 4,320 (example) | 120 | 72.0 | €14.40 |
LED panel 24 W | 24 | 2,880 (example) | 120 | 48.0 | €9.60 |
Competitor-case conversion and per-panel anchors:
- Example conversion: A sample 100 m² installation with 25 panels at 36 W may incur around €1,282/year in electricity and €400/year in maintenance based on typical operating assumptions.
- Converted per-panel: electricity ≈ €51.28/year, maintenance ≈ €16.00/year, total ≈ €67.28/year.
- Use these per-panel figures as procurement anchors and confirm original competitor assumptions before relying on them.
Project-scale cost and payback examples:
- Inputs to vary: panel unit price (€54 / €110 / €170), number of fixtures (25 / 50 / 100), annual saving per panel (use per-panel converted value or the worked-example value).
- Example outputs to produce for each price anchor:
- Total project cost, total annual saving, simple payback years, ROI% (ROI% = annual net saving / project_cost × 100).
Key variables and sensitivity scenarios to run for procurement:
- Primary variables to test:
- Operating hours: 1,200 / 2,000 / 4,000.
- Electricity price: €0.12 / €0.20 / €0.35 per kWh.
- Baseline troffer wattage: 54 W / 72 W.
- Panel wattage: 24 W / 36 W / 48 W.
- Controls: occupancy sensors, daylight dimming, Digital Addressable Lighting Interface (DALI), 0-10V.
- Sensor and dimming formulas:
- Occupancy sensor: effective_hours = operating_hours × (1 − occupancy_reduction). Annual kWh = (W_troffer − W_panel) × effective_hours / 1,000.
- Daylight dimming: effective_wattage = W_panel × average_dimming_factor. Annual kWh = (W_troffer − effective_wattage) × operating_hours / 1,000.
- Create three scenarios (conservative / typical / aggressive) and compute payback and ROI% for each.
Product performance factors to include when refining savings:
- Typical LED efficacy and lifetime to source from datasheet:
- Efficacy ranges: 100-180 lm/W (high-efficacy SKUs up to 180 lm/W).
- Luminous lifetime examples: ~50,000 hours with L90 ≈ 52,000 h.
- Conversion rules:
- required_wattage = target_lumens / lm/W.
- Higher lm/W reduces required_wattage for the same lux and increases annual kWh savings.
- Annualized maintenance saving = (fluorescent replacement_cost × frequency − LED replacement_cost × frequency) / project_years; derive frequencies from lifetime_hours / operating_hours.
Procurement-ready checklist and outputs:
- Per-fixture comparison table: Watts, lumens, lm/W, annual kWh (for selected hours), annual € savings.
- Project-scale tables: cost, total annual saving, payback years, ROI% for 25 / 50 / 100 fixtures at price anchors (€54 / €110 / €170).
- Sensitivity table: operating hours × €/kWh × baseline wattage permutations.
- Controls checklist: DALI compatibility, occupancy sensor options, daylight dimming strategy, commissioning notes.
- Compliance and optical checks: Unified Glare Rating (UGR), Correlated Color Temperature (CCT) requirement, Color Rendering Index (CRI) target, and all assumption footnotes (operating_hours_per_year, €/kWh, baseline wattage, efficacy, lifetime/L90).
We recommend running these templates with local operating hours and tariffs, confirming efficacy and lifetime from the OLAMLED datasheet, and then using the project tables to generate a formal RFQ and payback summary for procurement.
What Certifications Features And Warranty Should I Expect?
We require these certifications, photometric deliverables, optical and electrical specifications, and warranty evidence when specifying OLAMLED 600×600 LED panel light SKUs for commercial tenders.
Required certifications and safety marks:
- CE declaration of conformity or UKCA declaration of conformity as applicable to the delivery market.
- Compliance with BS EN 12464-1 for indoor workplace lighting and electrical safety to EN/IEC 60598 or verified national equivalents.
- Construction class listed as Class I or Class II and an IP rating appropriate to the installation (examples: IP20, IP40, IP44, IP65).
- Project-level confirmation that the supplied SKU has the stated declarations and test reports, noting that certification availability depends on product version and target market.
Photometric deliverables for lighting design and modeling:
- Illuminating Engineering Society (IES) files and LDT (Eulumdat) files supplied per SKU and per Correlated Color Temperature (CCT).
- Published lumen output and luminous efficacy (lm/W) for each SKU and wattage.
- Lumen-maintenance metrics reported as L70/L80/L90 with rated hours.
- Third-party photometric and thermal test reports available on request to support procurement evaluation.
Office optical targets and options:
- Unified Glare Rating (UGR) target: UGR < 19 for screen-task areas to meet common office criteria.
- Color Rendering Index (CRI) baseline ≥ 80 with CRI 90 available for colour-critical spaces.
- Correlated Color Temperature (CCT) options: 3000K, 4000K, 6500K, and tri‑CCT or power-selectable variants where specified.
Electrical, driver and control specifications:
- Nominal input: AC 220–240V 50/60Hz and power factor > 0.9.
- Driver location: state internal or external and provide thermal data for the chosen configuration.
- Dimming and control compatibility: DALI, 0-10V, Switch Dim, and wireless options such as Casambi/Bluetooth.
- Multi-wattage settings with documented wiring and setting diagrams.
- Emergency conversion kit or maintained emergency module options.
Warranty, service and procurement evidence:
- Preferred manufacturer warranty: 5 years with an explicit lumen-maintenance warranty where offered (example: L90 at 50,000 hours on qualifying SKUs).
- RMA and repair SLAs plus available third-party photometric and thermal reports as procurement evidence.
- OLAMLED example configuration: 50,000-hour lifetime rating and a 5-year warranty on relevant SKUs; confirm final warranty language on the project quotation and datasheet.
Compliance checklist for tender attachments:
CE/UKCA declaration of conformity attached
IES and LDT files per SKU and CCT attached
Lumen output and lm/W table per SKU attached
UGR, CRI and CCT values stated
IP rating and Class I/II stated
Driver location, power factor and dimming specs documented
Lifetime and lumen-maintenance warranty terms listed
Emergency compatibility and wiring diagrams provided
Lead time, MOQ and named technical contact included
d
Example lumen table (confirm with datasheet and quotation):
Model | Nominal Power | Typical Lumen Output (example) | Approx. lm/W |
|---|---|---|---|
600×600 — 18W | 18 W | ~2,520 lm | ~140 lm/W |
600×600 — 24W | 24 W | ~3,360 lm | ~140 lm/W |
600×600 — 36W | 36 W | ~5,040 lm | ~140 lm/W |
Document these items in the tender package and attach the corresponding datasheet and IES/LDT downloads for procurement approval.
600×600 Office Panel Light FAQs
We compiled common technical and procurement questions about the office panel light 600×600.
These FAQs help specifiers and procurement teams compare luminous efficacy (lm/W), Correlated Color Temperature (CCT), Color Rendering Index (CRI), Unified Glare Rating (UGR), control options (DALI, 0-10V), and procurement details such as lead time and MOQ.
1. Will a 600×600 panel fit my suspended ceiling?
Note that 600×600 mm panels are the dominant European modular suspended ceiling size.
Most commercial models are manufactured at a nominal 596×596 mm and fit roughly 95% of standard grids.
A true fit requires an internal opening of about 596–598 mm and a compatible grid profile (T15 or T24) so the panel lip rests on the flange.
We recommend specifying 1–3 mm clearance per side for thermal expansion, verifying ceiling void depth for a 32 mm slimline body and driver location, and planning a recessed kit or trimming if the opening is under 594 mm before ordering a 596×596×32 mm LED panel light.
2. Are 600×600 panels compatible with dimmers and controls?
We confirm most commercial 600×600 panels support common control systems, but verify the SKU and driver before specifying a dimmable 600×600 panel.
Supported protocols include 0-10V (analog control), DALI (Digital Addressable Lighting Interface) and DALI-2 (updated interoperability standard), DMX (Digital Multiplex) and Casambi for a Casambi compatible panel.
Commissioning should confirm integrated versus external driver, assign DALI/DALI-2 addresses or wire 0-10V, verify driver firmware and dim curve, provision gateways for DMX or Casambi, test emergency-conversion kits, check supply and earth, validate Unified Glare Rating (UGR) and photometrics, and integrate occupancy sensors with led panels for zoning and vacancy control.
3. What cleaning and maintenance do these panels need?
We recommend wiping the LED panel light diffuser and frame monthly with a soft, lint‑free microfiber cloth.
Perform a deeper clean and full inspection every six months and after flooding or smoke exposure to protect luminous flux, luminous efficacy (lm/W), and warranty coverage.
Power off and isolate circuits before cleaning, use a mild pH‑neutral detergent diluted in water or 70% isopropyl alcohol for stubborn marks, and avoid abrasive pads, ammonia, acetone, or strong alkali cleaners; use a soft‑bristle brush and a non‑metal ladder for safe access.
Inspect the diffuser for yellowing or cracks, verify clips/suspension and T15/T24 grid fit, confirm driver housing temperature and absence of water ingress, check wiring terminations per NF C 15‑100, confirm CCT and CRI labels and IP rating, do not open integrated drivers or DALI or 0-10V modules, keep inspection records, and verify lumen maintenance (L90 or typical 50,000 hours) on the datasheet.
4. How does lumen depreciation affect long-term brightness?
We define lumen depreciation as the gradual loss of luminous flux from an LED over its service life.
Lumen Maintenance metrics L70 and L90 quantify that decline by stating the hours to reach 70% and 90% of initial lumen output.
Commercial product data commonly lists lifetimes near 50,000 hours (approximately 15 years at 3,300 hours per year) with L90 near 52,000 hours as planning baselines.
We recommend applying a maintenance factor (for example 0.7) in lighting calculations, requiring manufacturer-stated L70 and L90 in technical specifications, and planning relamping or replacement at L70 or when NF EN 12464-1 lux requirements are no longer met.
5. How should I dispose or recycle old panels?
Disposal of old 600×600 panels must follow Waste Electrical and Electronic Equipment (WEEE) and applicable local e-waste laws, and retain CE and UKCA records where required. We prefer manufacturer take-back or distributor recycling programs and recommend reuse or refurbishment before recycling; typical panel life is around 50,000 hours. Follow these decommissioning steps:
- Isolate power and verify with a tester
- Label circuits and remove panels (5–30 minutes per tile)
- Disconnect drivers and emergency battery modules
- Store parts safely and handle batteries per battery-waste rules
- Sort aluminum frames, steel backplates, plastic diffusers (TP(a)), LED modules and electronic drivers for specialist recyclers